
This is an old revision of the document!
Table of Contents
Seedling acclimatization
Your next role in raising these babies into maturity will be gradually acclimating them to normal conditions that adult plants experience. First, you'll want to start ramping up the amount of light they are exposed to. Next, you must get them used to ambient humidity, then bottom watering, fertilization, and finally, if you decide it is in their cards - the great outdoors.
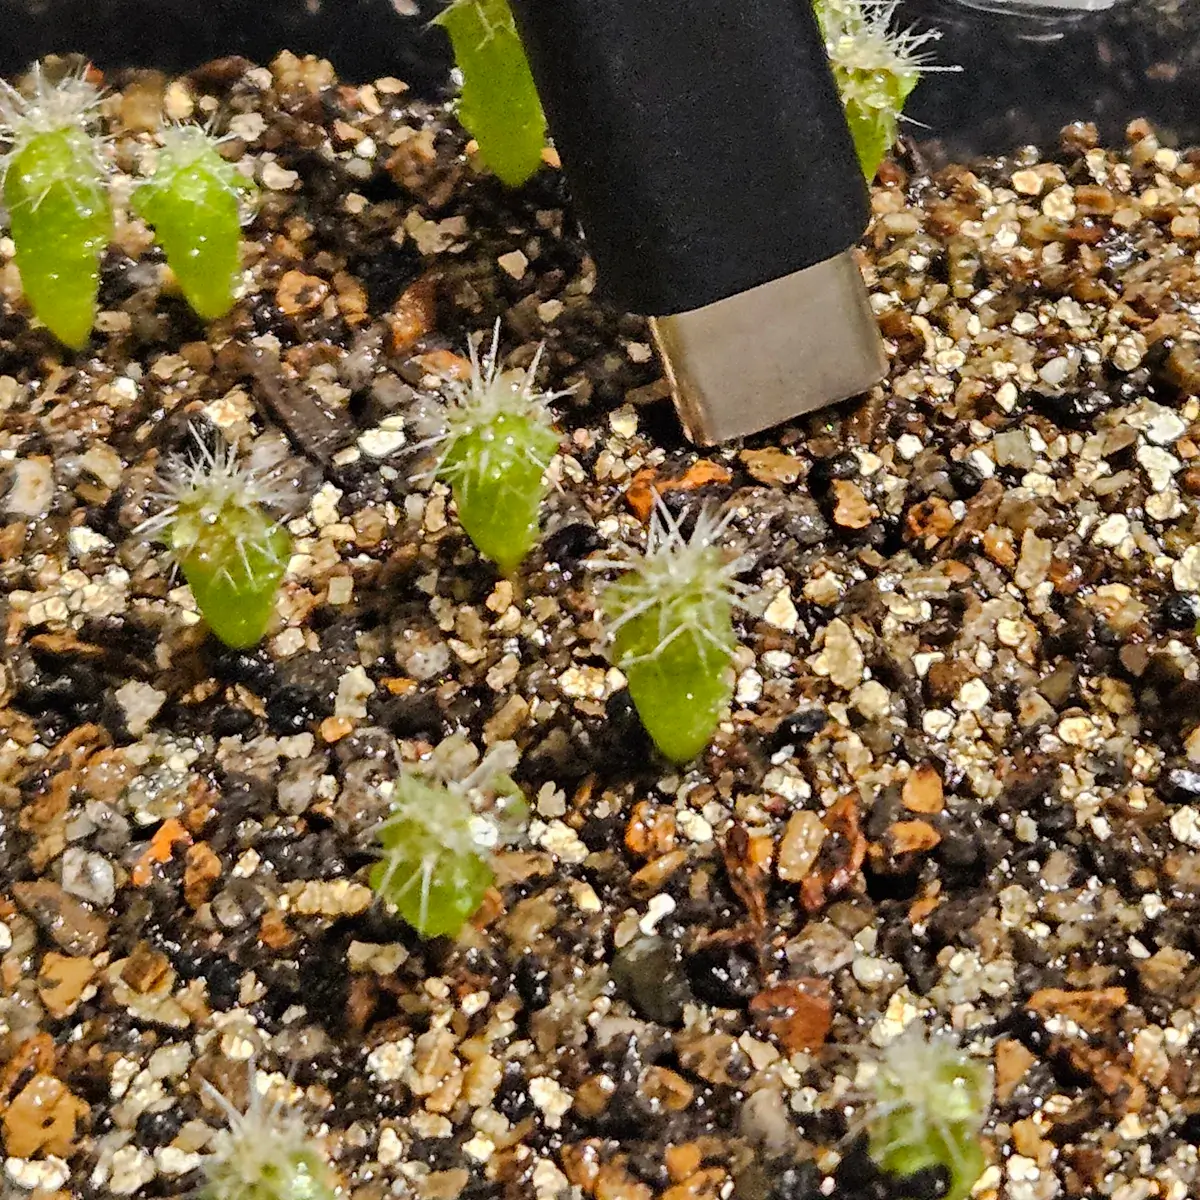 Seedlings ready for acclimatization
Watching for stress
During the acclimatization process the seedlings need to be watched daily for signs of stress. The main signal they will give off that they are stressed is through their color - Yellow, red, purple are a sign something is stressing them. If left unchecked it will stunt the seedlings, stopping growth until they have recovered, which can take days to weeks. Red stress coloring can be caused by a number of different factors. Too much light, too dry, too cold at nights, low on nutrients P and K. Low nutrients as a stressor will be easy to distinguish because the red will spread from the base upward while the rest will spread from the tip down.
As to which of the other factors is causing the stress, the best way to determine is to use context. Did you just turn up the light? Have they been very dry lately? Is it getting too cold at night? Rule things out and correct the issue. Stress compounds with multiple factors so try to only push one variable that could stress them at a time.
Acclimatization
Light
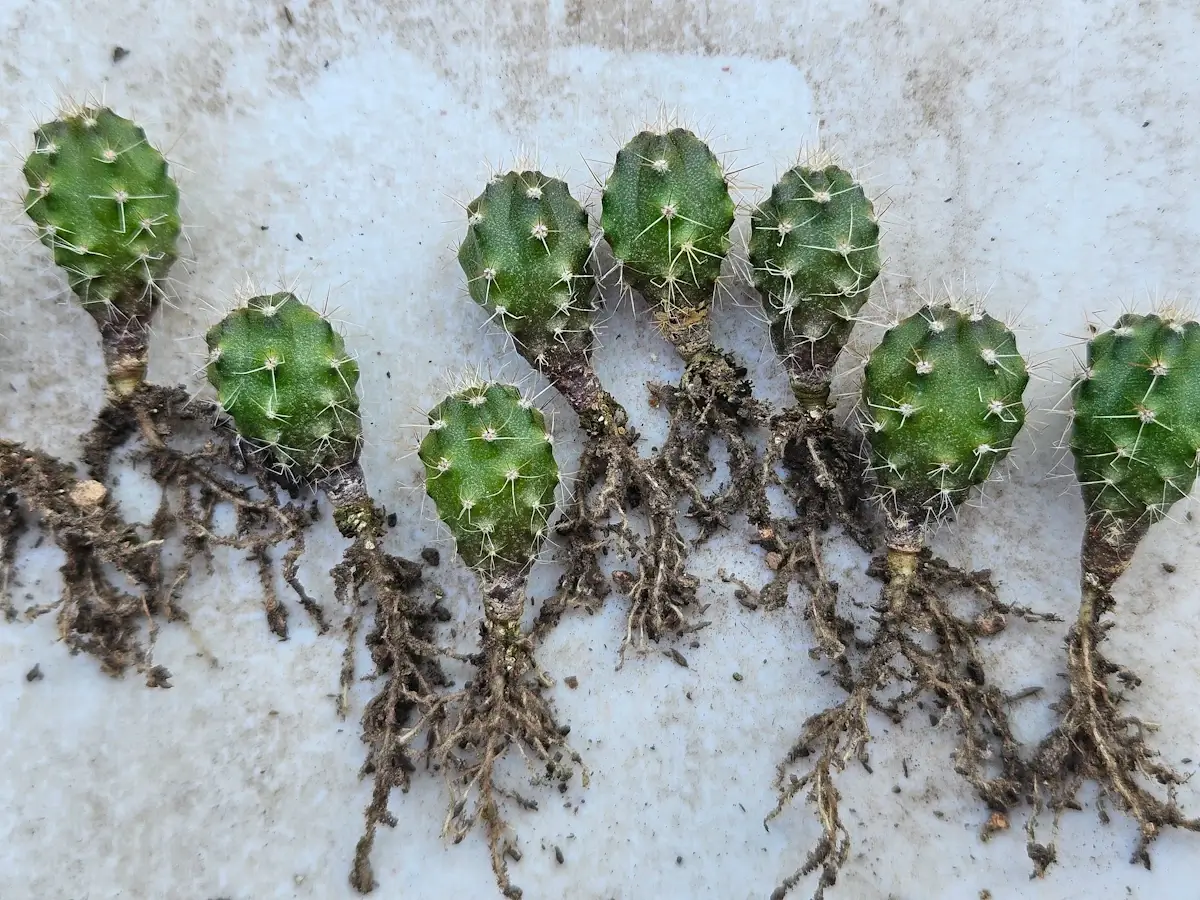 Fat Seedlings that received plenty of light very early
Starting at about one month after germination, you should start making small (~10%) incremental increases to light amounts. This can be done with a dimmer dial, by moving the light closer to the seedlings by about an inch, or increasing hours of light per day by a half hour. Let them adjust for a week and a half to two weeks, making sure they don't turn red in the first couple days, then repeat. Continue as long as they are not stressed until you can get them outdoors or under artificial full sun equivalent. Increasing light intensity early and as quickly as they will tolerate is the key to growing fat seedlings that can support their own weight and don't need to be staked up later.
Humidity
Acclimating to ambient humidity can be done as soon as the seedlings have at least 3 rows of spines. Doing it as early as possible will allow for more growth more quickly. It's done over a three week period, with gradual adjustment steps taken every few days. First, poke a couple small holes in the plastic wrap. Then a few days later, make the holes bigger. Then nearly rip all the plastic off. Make sure it stays humid though, if the condensation on the walls all evaporates at any point, mist them. Once all the plastic has been removed you want to mist them three times per day for a few days, then twice per day, once per day, down to every other day. When you get the plastic off the top is when you want to add drainage holes to the bottom of the container. Being careful not to spill or tip over seedlings, you can poke, slice, or cut small holes in the bottom. If the holes are too large you’ll lose substrate when you water so keep them small and at the lowest points in the container. One easy way to do it is with a hot metal poker, you can punch holes in the plastic like butter. Once they’re acclimated and have drainage holes added, switch to alternating waterings between bottom watering and misting/spraying from the top to make sure the substrate doesn’t stay dry beneath the surface or go hydrophobic. Be careful not to disturb or flush out substrate when watering by pouring onto them from the top or bottom watering with too high of a water level. Dilute fertilizer or kelp can be added to the mister at any time - see the next section. At this age I do not recommend you ever let them dry out completely. Water when the soil is only mostly dry to keep them plump, hydrated, green, and growing rapidly. If they start to look a little shriveled, you are probably letting the soil get too dry between waterings or need to keep misting every once in a while because of humidity issues.
Fertilizer
I recommend alternating adding a liquid kelp product and a complete NPKCalMag and micro nutrient fertilizer at a dilute strength, about half label rate, as you mist and water these guys. Jones Juice and Maxicrop are good choices for a kelp product. Masterblend 3 part, General Hydroponics Maxigro, and Megacrop are good choices for a nutrient fertilizer. You can slowly increase the concentration, working up to full strength by around month 5.
Moving them outside
When I have my small underpowered germination light as close as it can get to them, I have my timer set to 20 hours per day, the seedlings are uncovered and are looking healthy, I move them outside. Even if the light was pretty strong, jumping straight to full sun is too much because the spectrum of light is different. I start them under 4 or 5 layers of 30-40% shadecloth and remove one layer every two weeks or so. Keeping them covered by one layer of shadecloth may be required to prevent stress in very high UV areas in summer for their first season
Supporting
The next step will be uppotting. Once the seedlings touch each other they will slow in growth as they compete for nutrients and space. The roots will also start to get tangled which can make future uppotting more challenging. If you followed the recommended 4-6 seeds per square inch of substrate surface and managed to space them very evenly they may get to half an inch or more before this is required but if you sowed more densely or they got clumped it may be optimal to space them out sooner.
You can up pot them from here into a larger tray or into individual cells or pots. For a larger tray, I would aim for 3-5 inches of depth. Potting the soil line at the top of the tray is optimal to allow airflow, reduce humidity, and reduce pest and fungal issues. If you want to try out cells or individual pots, 2.5 x 2.5 x 3“ work really well at this stage.
Prepare the substrate for the next step per the guidelines laid out in the mature soil discussion, with the considerations that inorganic particle size should be proportionally smaller for smaller plants at 1/8”-1/4“, and slightly more organic per inorganic might be better for small seedlings because they have less internal moisture reserves and prefer their soil to stay moist a little longer. From this point out, you can treat your seedlings pretty much the same as mature plants.