
Sowing the Seeds - Step by Step
You are ready to sow the seeds. Before you start, try to minimize potential contamination by washing your hands, sterilizing tools, and wiping down surfaces with a disinfectant. Let's get going!
Step 1: Hydrogen peroxide soak (optional, but strongly recommended)
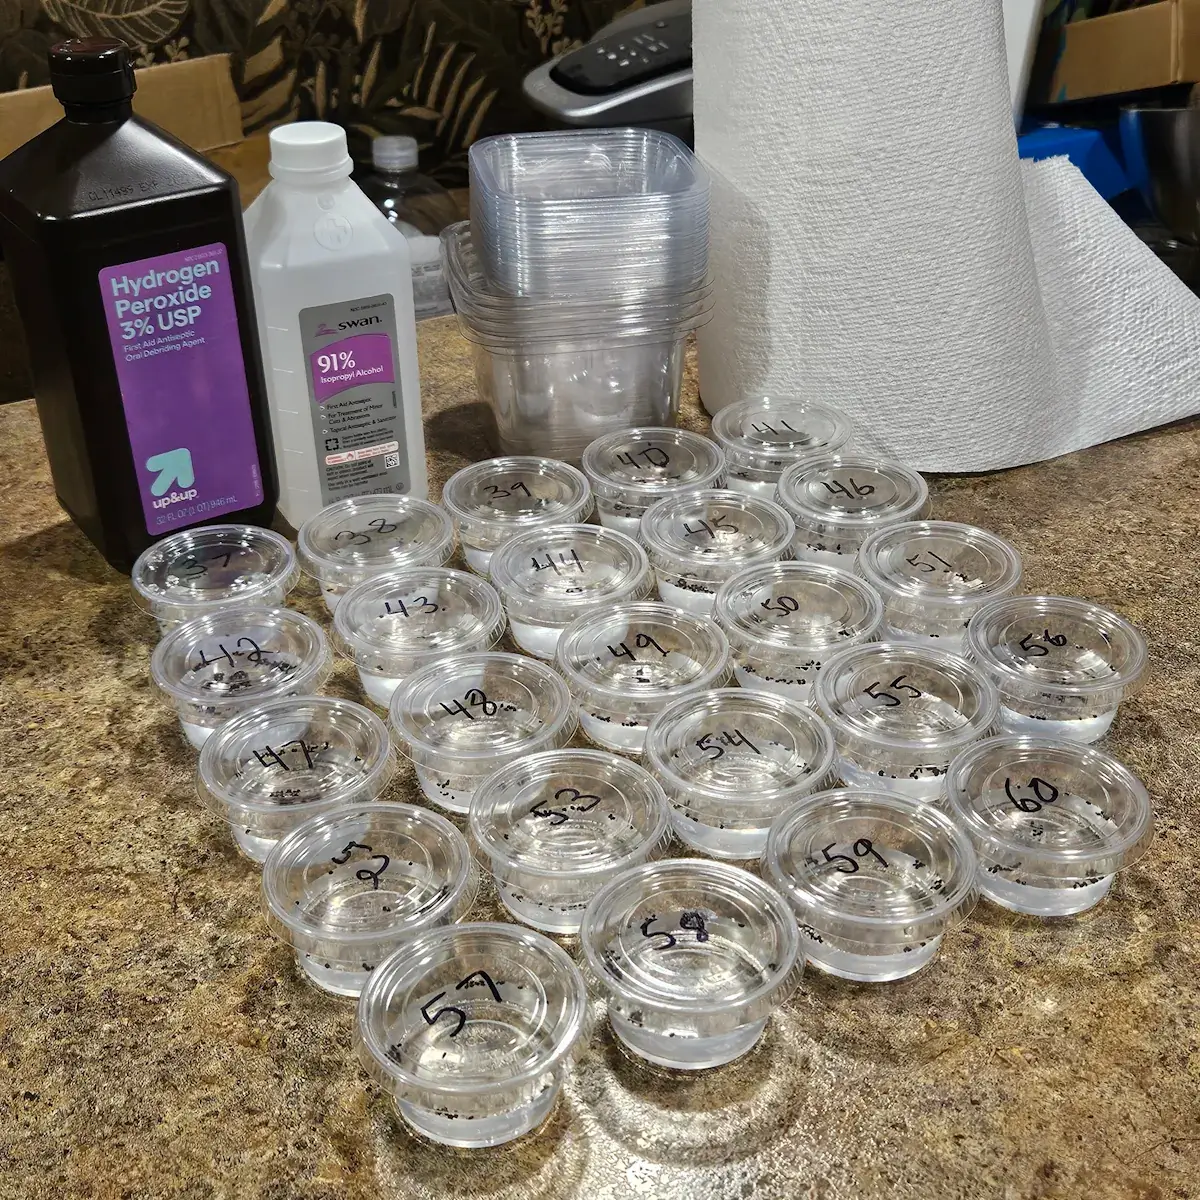 Sterilizing multiple varieties of seeds at once with a hydrogen peroxide soak
Soaking the seeds in hydrogen peroxide before sowing will kill any contamination on the outer seed casing and has the added benefit of hydrating and oxygenating the seed, prepping it for germination! This step can speed up germination and boost low germination rates due to seed viability issues. Pour the seeds and a splash of hydrogen peroxide into a cup. If you are doing multiple varieties at once, consider using disposable cups and labeling them. If you want to do a short soak primarily for sterilization, one hour with straight 3% hydrogen peroxide is fine. For a longer soak that will also boost germination, I cut the hydrogen peroxide 1:1 with purified water for a 6 hour soak or even as dilute as 1:10 for a 12 hour soak. I've never burned my seeds with hydrogen peroxide, but I don't want to risk it. It's normal for the seeds to float or sink. When you are ready to collect the seeds from the hydrogen peroxide you can pour the mix through a filter such as a coffee filter or paper towel placed over a cup, then let the filter/paper towel dry. While they are drying you can move on to complete Step 2. Once dry you should be able to easily brush them off of the filter onto a folded sheet of paper, a paper plate, or into an envelope, whatever method you prefer.
Step 2: Prepare the substrate
I recommend sifting out a quantity of extra fine layer of vermiculite through some window screen to keep separate to start. You don't need much, a few tablespoons for a small container is plenty. Then take enough vermiculite to fill the germination container about 1.5 inches deep and moisten it. You want to add water slowly and as you mix - too much moisture and it will be a soggy mess. Take a handful and squeeze it hard. A few drops of water should come out when you have the amount perfect. If it's too wet, mix in more dry vermiculite or start over. There is no need to sterilize vermiculite - it should be sterile straight out of the bag. If you have stored it open or in an alternate, non airtight container, you may consider sterilizing it, but it's probably still fine.
Step 3: Prepare the germination container
Sterilize, label, then fill the germination container with 1.5 inches of moist vermiculite. Get it flat and level, but don't compact it down. Sprinkle the extra fine window screen sifted vermiculite on top - just to where you can't see the larger pieces under it, not any thicker than a ⅛ inch layer. This extra fine layer acts as a pillow for the seeds to land on. If they were to fall down in a crack between larger pieces and not get any light, they would not germinate.
Step 4: Sow the seeds
You can use a folded sheet of paper and roll them off the crease, you can poke them with a slightly damp finger and brush them off, or you can just sprinkle them around as evenly as you can. This is called broadcasting. Sometimes for very rare or valuable seeds it's worth sowing each individually for the most even spacing possible, but for most Trichocereus this is unnecessary and quite difficult. I've found that seeds spaced about ⅜ inch apart will do the best during their time in the germination container. This comes out to about 4 to 6 seeds per square inch. Too close and they slow down when they touch, too far apart and they seem to suffer some loss of humidity.
Step 5: Mist and seal
Mist the seeds with purified water and then seal the containers with plastic wrap. They're ready to go! Place them in the germination area you prepared and the wait begins. For the next couple months, you don't need to do much, but you will want to check in on them frequently to make sure they're happy and coming along with out any issues.