
This is an old revision of the document!
Table of Contents
Choosing a Grow Area, or Preparing a Germination Station
These seeds need the following things to germinate:
Moisture
Not waterlogged, not dry, but somewhere in the middle that we call “field capacity”.
Temperature
For best germination results temps should remain between 68-86F constantly during germination and for about a month afterward.
Light
The seed needs to be hit with light to germinate. Nothing too powerful at this stage - direct sun will cook seedlings in no time flat. Direct sun means you can draw a straight line from the sun to the seedlings container. Indirect sun or direct light from a controlled low power artificial light source is required.
Minimalist setup
If you have great conditions that you don't need to control, or if you are on a tight budget, it is possible to germinate by placing the containers somewhere that has perfect conditions. For example, on a windowsill that does not receive any direct sun and indoor temperatures of 68-86F, or if the weather is just right outdoors somewhere with bright indirect light only, no direct sun. The time of year you sow the seeds should be considered when going for a minimalist setup as it can impact temperatures and light significantly. Using these methods a wifi hygrometer with alarms set for high temp is a great tool to prevent the seedlings from overheating if the sun accidentally peeks through. Increasing light incrementally as the seedlings grow will be a real challenge. Though not a requirement, for the most consistent, repeatable, results with the highest germination rates, a controlled environment is recommended - a germination box.
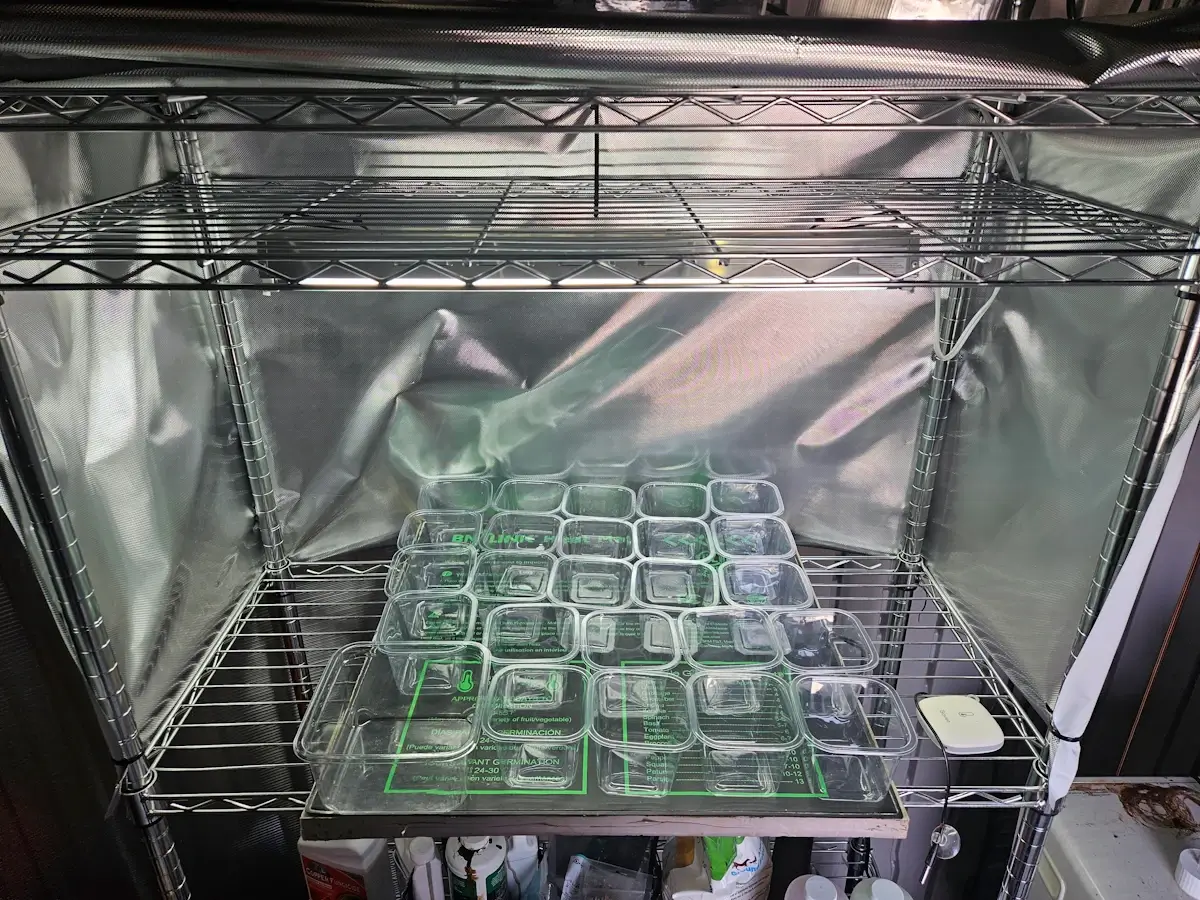 A successful fully controlled germination station
Constructing a germination box
Everyone is going to have different conditions available to them, and therefore different variables they aim to control within their germination box, but here are some ideas of what to consider.
Location
The space should have ambient temperatures in the 68-86F range. It's OK if it gets a little cooler at night, a heat mat can be used to bump up soil temperatures by 10F.
Build
Wire rack shelving is a top notch choice of build method due to the customizable shelf heights that allow fine adjustment of light distance and vertical airflow freedom, but there are many other creative ways to set up the germination station, from boxes to indoor shelves. Even just placing the tray on a table with a light stand over it can be acceptable. It depends on your space and which variables you need to control.
Thermometer/hygrometer
Smart hygrometers nowadays that record a graph of various values over time you can access from an app. Extremely useful for optimizing the conditions in your grow space.
Heat mat with soil probe thermostat
The temperature during germination and for a month after should stay between 68-86F. If you can provide these conditions without a heat mat, you don’t need one. If you will be placing the containers on a wire rack shelf, on uninsulated flooring like concrete or asphalt, or on a countertop that could be damaged or drain the heat away, it can be a good idea to cut a piece of foam insulation board under the heat mat which will have the added benefit of directing all heat upwards toward the containers and not heating the surface below the heat mat. If you are going to use a heat mat, get a soil probe controlled thermostat or all in one controller. I recommend setting up an extra identical container to the one you sow into with the same substrate, moisture, sealed with plastic wrap, then punch a hole in the side, stick the thermostat probe in and seal it with something watertight like silicone. If you put the soil probe into a container with seedlings it will move over time and uproot some seedlings. Do not rely on heat mats to increase soil temperatures more than 10F. Turn off or remove heat mats when you uncover seedlings, they are no longer helpful past this point and will result in the substrate drying too quickly.
Grow light
Germinating under an artificial light is the most repeatable and consistent method. It allows for incremental light increases as your seedlings grow which is a huge benefit to seedling growth speed, health, and girth. On a tight budget a 2 tube T5HO or a couple Barrina T5 LEDs are acceptable for germination and the first few months, but the seedlings will need to be moved to a stronger light or outdoors under shade cloth after that, earlier than if you choose a better light. The light fixture would be best hung in a way that allows height adjustment, as the distance between the light and the container greatly impacts the intensity the seedlings receive and we will need to increase the light intensity in small increments often. A major upgrade that is capable of growing longer than 3 months would be an LED panel grow light with a dimmer knob like those sold by Spiderfarmer, Mars hydro, or Viparspectra. Make sure the light has a published ppfd map, which all high quality grow lights have. It is possible to put layers of paper towel over the germination container under a non dimmable light, but this is significantly riskier and more difficult to fine tune while slowly increasing their light exposure later. Plan ahead - if they are staying inside you should have a light capable 750 ppfd across the grow area by month 6 to 8, and hopefully 1000-1250 ppfd across the grow area beyond one year. The lights should be on a timer - I like a 12 hour on, 12 hour off schedule to start.
Light surround
A surround is built by hanging reflective textured mylar, matte white butcher paper, or cardboard painted with matte white spray paint vertically around the light and container or plants. You can make the forward facing panel a flap that can be folded up for access. Surrounds are typically required to hit the ppfd numbers that lights advertise. This bounces light back on to the plants that would otherwise be lost out into the room. A surround like this can increase light exposure by double. Do not use untextured reflective material like foil or glossy white paint which can reflect the light unevenly and can create hot spots. Using a grow tent is an easy way to provide a light surround - the interior walls are typically designed for this purpose.
Light meter
When setting up artificial lighting for the first time you want to make sure you aren't going to scorch your seedlings the moment they pop out of the seed casing. A light meter can allow you to rest easy. A member of the community tested a cheap $30 light meter side by side with a high end light meter and the apps that use your phone's camera. The cheap meter did perfectly fine, but the phone apps were off by as much as half to double the correct reading so I do not recommend using the apps. A good amount of light for germination through the first month is around 62 ppfd/2700 lux. Try turning the light all the way up and/or moving it as close as you can without worrying about burning and get a reading there too - the seedlings will want 500 ppfd by the time they are a couple inches tall, when you could move them out to direct sun under layers of shade cloth if you wanted to.
Ventilation
Once the seedlings get to the point they are ready to be uncovered, air movement via a fan is strongly recommended. Additionally, humidity is a factor that influences growth rate as well as many common health issues. Optimal humidity would be around 0.8 VPD at night. VPD is a way to measure humidity relative to temperature - google VPD charts or get a controller that is capable of controlling VPD. During the day, generally low humidity is desirable for drying the substrate and preventing fungus, mold, pests, and disease. You have some wiggle room on these values as long as you don't have humid stagnant air during the day or bone dry air at night.
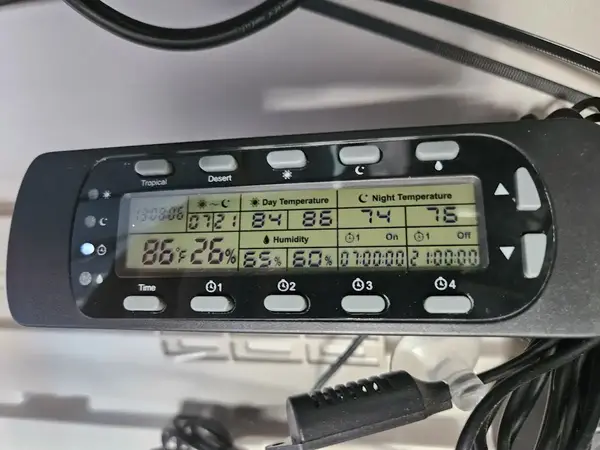 A reptile terrarium controller
Controller
Lights need a timer, heat mats need a soil probe thermostat. Bonus points if you can control the relative humidity/VPD. Even better if you can automate separate day and night settings. There are reptile tank controllers available that have separate day and night settings and monitor and control the light timer, dehumidifier, fan, and heat mat, all in one.
Before sowing your seeds, it is recommended to test out your germination station by running it for a couple days with a wifi hygrometer in it to make sure the conditions are optimized and ready for your seeds.
Next, you are ready to gather your materials for germination.